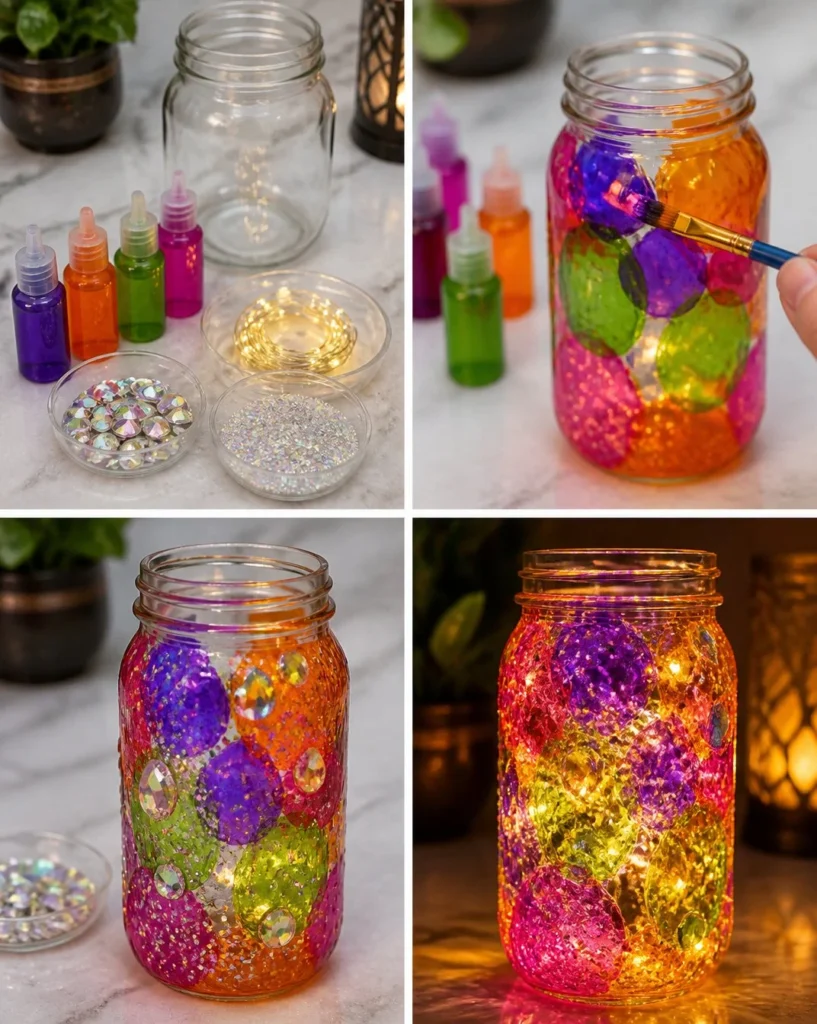
Imagine a sunny afternoon, filled with vibrant colors and a sprinkle of magic. You gather your family and create a swirling Glowing Rainbow Potion Crystal Jar that transforms a simple mason jar into a mesmerizing light-filled treasure. As you paint each translucent color and layer in sparkles, you can’t help but feel the excitement in the air. Together, you’ll embark on a playful adventure, where science meets creativity and childhood wonder shines bright.
Why Make This Glowing Rainbow Potion Crystal Jar
Crafting this Glowing Rainbow Potion Crystal Jar brings a pop of color to your home and fills your hearts with joy. This project delights both kids and adults, showcasing the magic of layering colors and the thrill of watching creativity come to life. It offers more than just a beautiful decoration; it fosters teamwork and sparks conversations about colors and light.
When you finish, you won’t just see a glowing jar; you’ll feel a sense of accomplishment and shared wonder. It’s a perfect project for rainy days or special occasions, bringing a touch of brightness even when the sun isn’t shining.
A Quick Look at How It Works
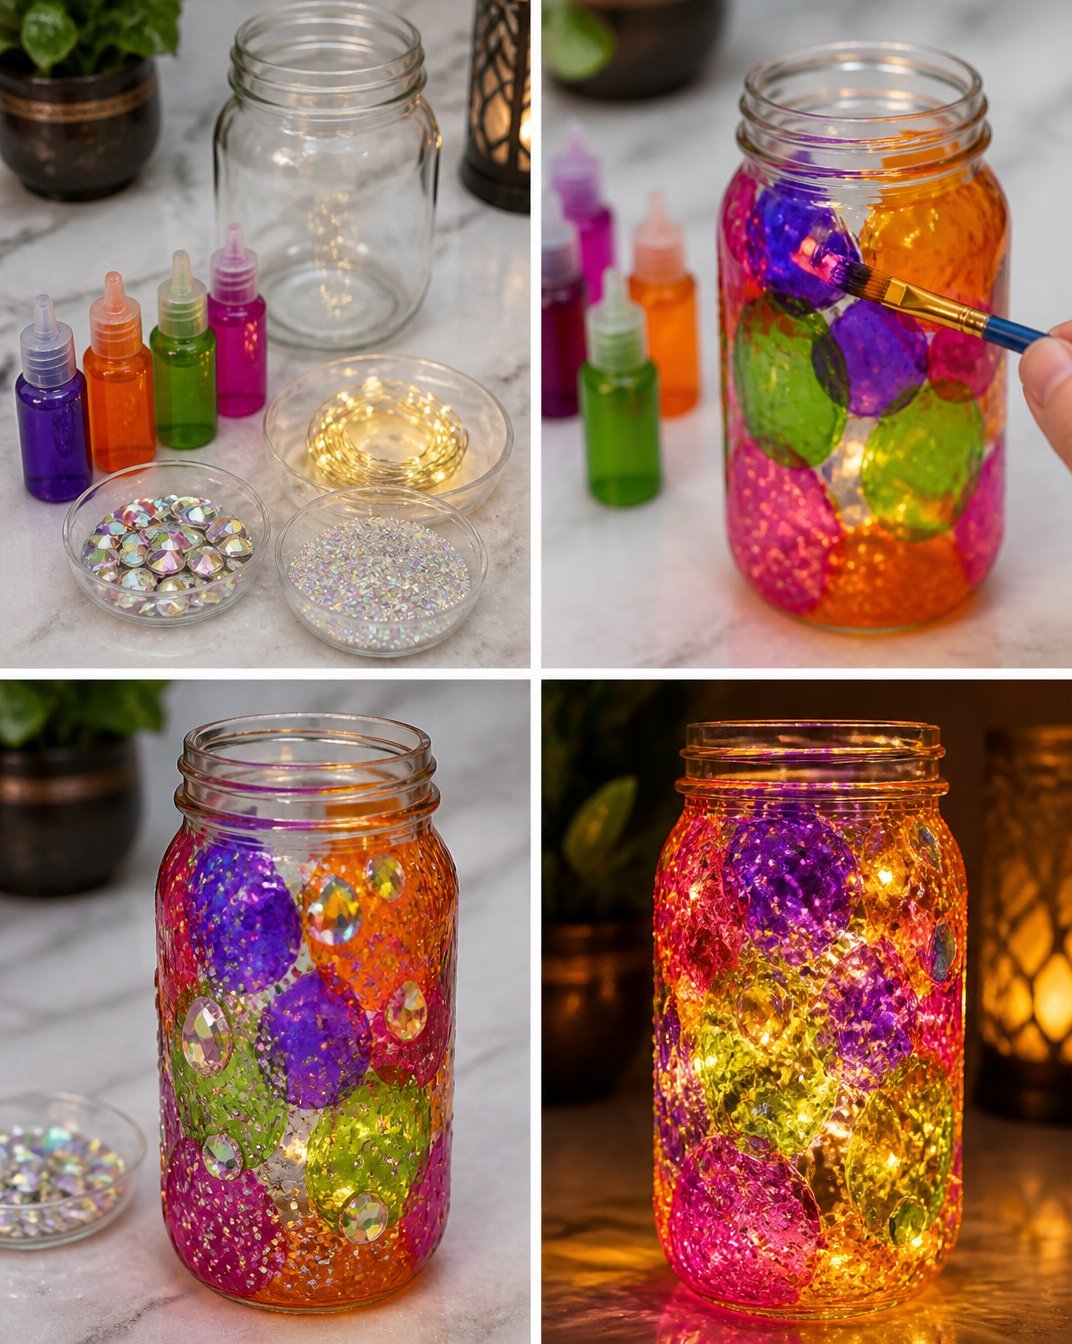
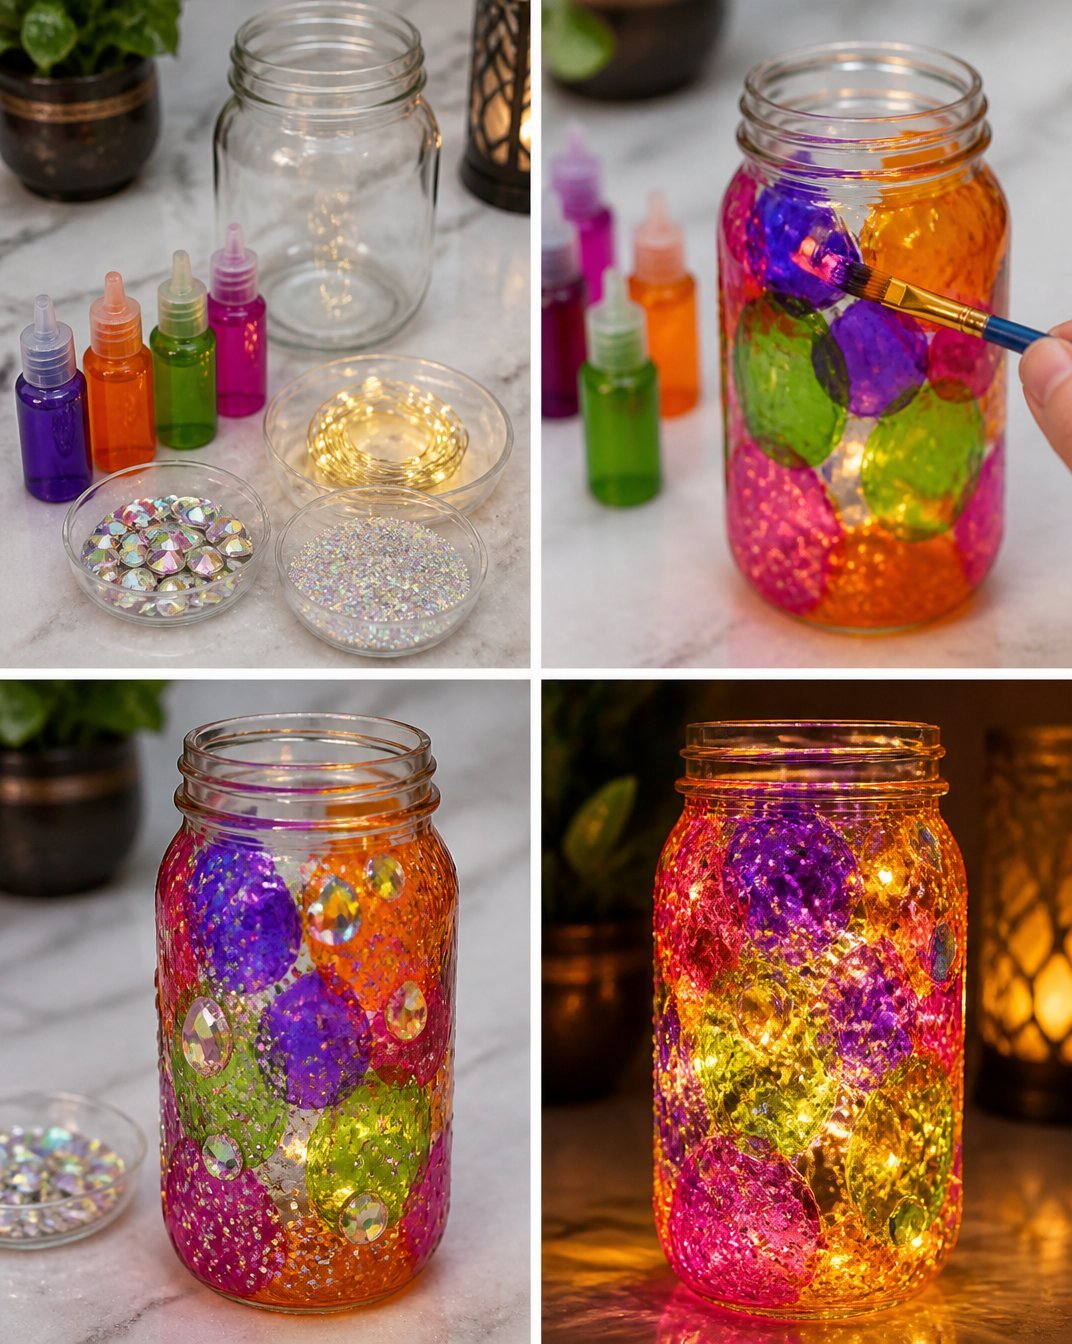
This DIY comes together with simple steps that create dazzling results. You’ll start by painting vibrant colors on a mason jar, using translucent paints that let light shine through. The layering effect creates a mesmerizing glow as evening descends. When you add the micro LED fairy lights inside, the jar transforms into a glowing potion filled with whimsical charm.
The science here is all about light and color. Translucent paints allow light to filter through, creating a magical display that shifts and dances as you move around it.
Materials You Will Need
Gathering your materials is the first step toward creating your Glowing Rainbow Potion Crystal Jar. Here’s what you’ll need:
- 1 mason jar
- Translucent purple glass paint
- Translucent orange glass paint
- Translucent green glass paint
- Translucent pink glass paint
- Iridescent gems
- Holographic glitter
- Micro LED fairy lights
All these materials are easy to find at craft stores or online. Feel free to substitute with other bright colors or sparkly elements you love. Remember, this is about making it your own!
Step-by-Step Directions
Step-by-Step Directions
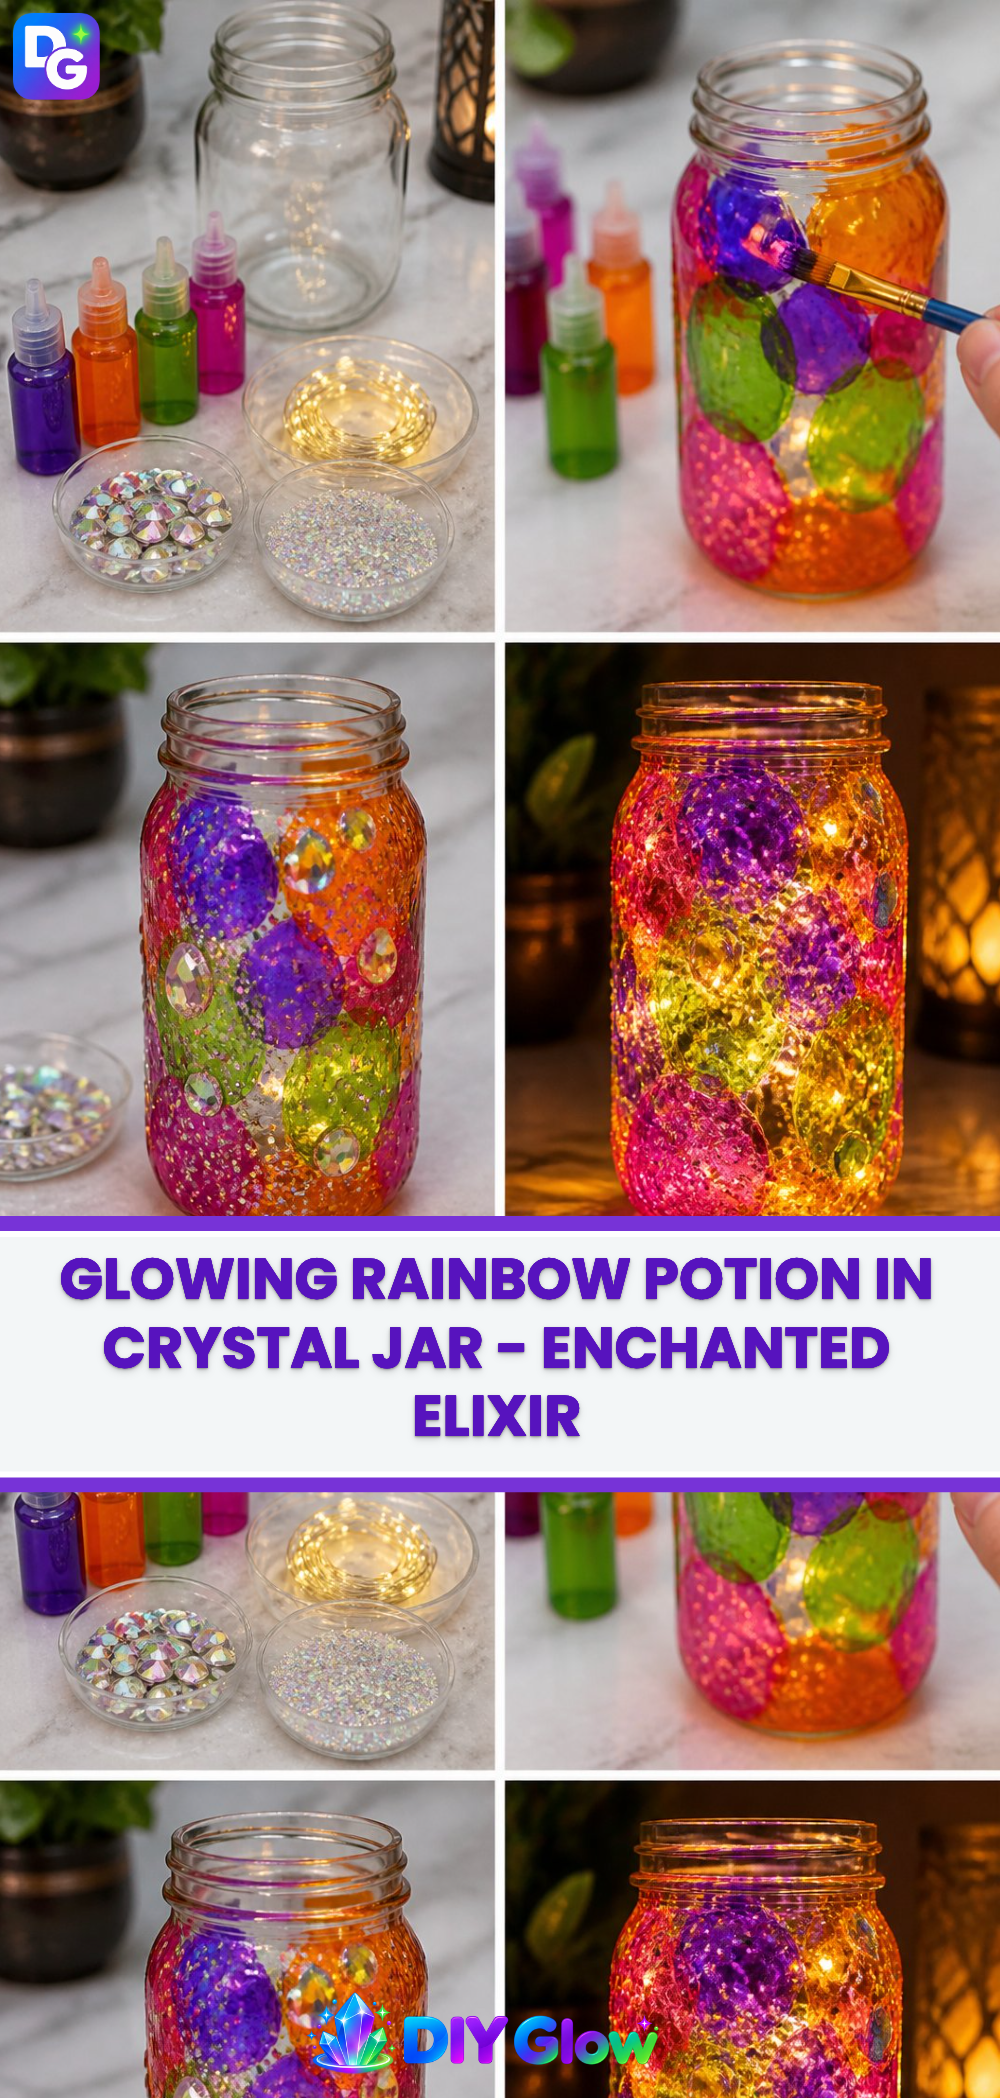
- Start by painting overlapping translucent color patches around the mason jar. Watch as the colors blend beautifully!
- Sprinkle in iridescent gems and tiny accents of holographic glitter for a magical touch. These will catch the light and add extra sparkle.
- Allow everything to dry completely. Make sure to be patient; this step is vital for the best results.
- Finally, fill the jar with micro LED fairy lights for a glowing potion effect. When you turn the lights on, you’ll see your creation come to life!
Always supervise children when handling materials, especially if using small parts or in the case of adult supervision needed for any heating elements.
Displaying Your Finished Glowing Rainbow Potion Crystal Jar
Once your Glowing Rainbow Potion Crystal Jar shines bright, it’s time to find the perfect spot for it. Display it on a windowsill where sunlight can enhance its colors during the day, and let it illuminate your room at night.
You could also gift it to a friend, spreading a bit of joy and creative spirit. Imagine their delight as they unwrap a glittery, glowing treasure.
This unique jar can also bring charm to special occasions. Use it as a centerpiece for a birthday party or a vibrant decoration for a family gathering. Wherever it goes, it’s sure to become a conversation starter!
Keeping Your Glowing Rainbow Potion Crystal Jar Looking Great
Taking care of your Glowing Rainbow Potion Crystal Jar is as simple as enjoying it. To keep it looking great, store it in a cool, dry place when not on display. Avoid placing it in direct sunlight for long periods to prevent the colors from fading.
The beauty of this craft is that it can last for a long time, provided it’s handled gently. If any dust collects on the jar, wipe it down with a soft cloth. Just be careful not to damage the delicate design you’ve created.
Fun Tips and Colorful Variations
Take your Glowing Rainbow Potion Crystal Jar to the next level with a few friendly twists. Here are some ideas to inspire you:
- Try different color combinations! Instead of choosing pastel shades, how about vibrant bold colors for a sunny summertime glow?
- Experiment with the size of the jar. A larger jar can hold more lights and gems, creating a more dramatic effect.
- Add seasonal decorations. For example, during autumn, you could incorporate orange and gold tones, or for winter, whites and icy blues.
- Share your project! Invite friends over for a crafting party. It makes for a delightful way to bond while creating something beautiful together.
- Create themed jars to celebrate holidays or milestones, like a spooky jar for Halloween filled with purple and black shades.
FAQs About Glowing Rainbow Potion Crystal Jar
Will it really glow?
Yes! When you add the micro LED fairy lights, your jar becomes a glowing masterpiece, bringing magic to any space.
Is it safe for kids to make?
Absolutely! Just remember that children will need adult supervision during painting and when using the lights. Always ensure small parts are kept away from younger children.
How long does it take to make?
This project typically takes about 1-2 hours (including dry time). Plan for drying time to ensure it looks its best.
Why did mine not turn out?
If the colors aren’t vibrant, check that you applied enough layers of paint. If they bled too much, you might want to try letting one color dry before applying the next.
Can I change the lights later?
Yes! You can always remove and replace the fairy lights if you want to try different colors or styles. Just be gentle while doing so!
A Little Note Before You Go
Making your Glowing Rainbow Potion Crystal Jar is a wonderful way to turn a simple afternoon into a memorable adventure. Embrace the colorful possibilities, let your creativity flourish, and don’t be afraid to experiment with different colors and styles. Enjoy the magical process of crafting something that sparkles and glows, brightening your days and nights. Feel free to share your creations with friends and family or keep it as a shining gem in your home. Happy crafting!
Follow us on social for more DIY ideas & inspiration!
Glowing Rainbow Potion Crystal Jar
Would you like to save this project?
By submitting you agree to receive this project and occasional emails. Unsubscribe anytime.
Materials
For the jar decoration
- 1 unit mason jar Choose a clear mason jar to showcase the colors.
- 50 ml translucent purple glass paint Use translucent paint for optimal light filtering.
- 50 ml translucent orange glass paint
- 50 ml translucent green glass paint
- 50 ml translucent pink glass paint
- 1 cup iridescent gems Can be substituted with other glittery decorations.
- 1 cup holographic glitter
- 1 set micro LED fairy lights Choose small LED lights to fit inside the jar.
Directions
Painting and Decorating
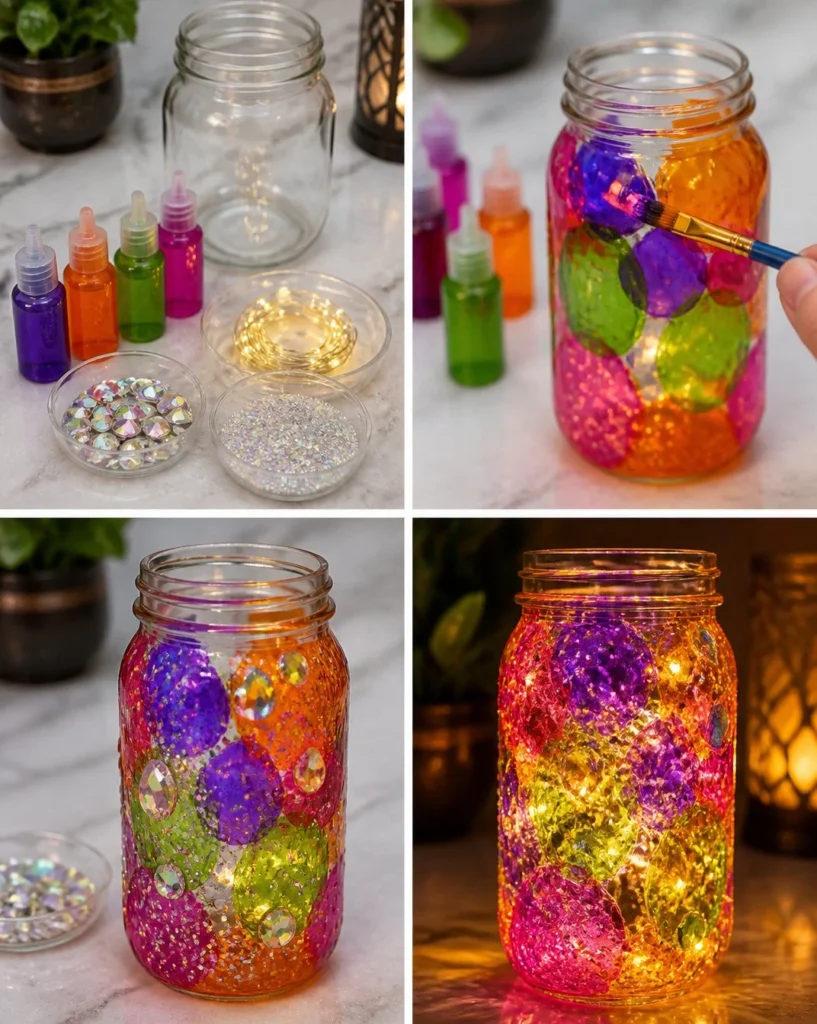
- Start by painting overlapping translucent color patches around the mason jar. Watch as the colors blend beautifully!
- Sprinkle in iridescent gems and tiny accents of holographic glitter for a magical touch. These will catch the light and add extra sparkle.
- Allow everything to dry completely. Make sure to be patient; this step is vital for the best results.
- Finally, fill the jar with micro LED fairy lights for a glowing potion effect. When you turn the lights on, you’ll see your creation come to life!
Last Step: Don’t forget to leave a rating and comment below! It helps other readers find the best DIY projects — and it helps us too!