

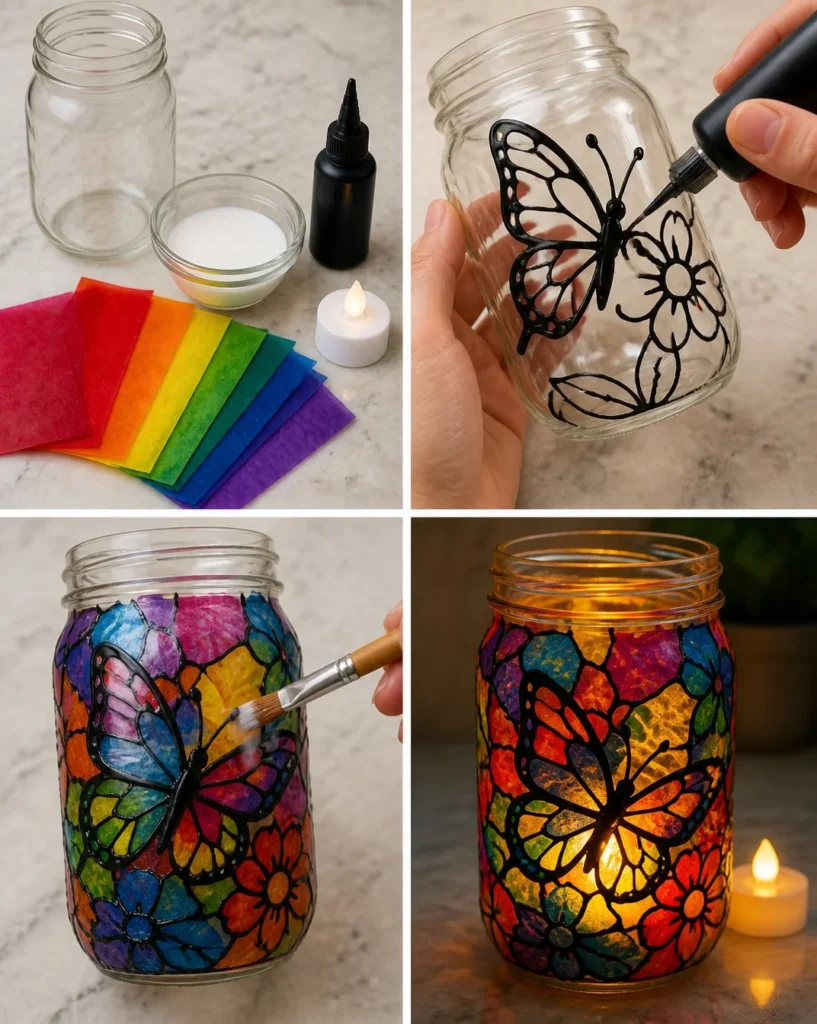
Why Make This Stained-Glass Rainbow Butterfly Jar
Creating your own Stained-Glass Rainbow Butterfly Jar brings a delightful blend of art and science right to your table. This project invites children and adults to explore colors, light, and creativity. The jar transforms with a captivating glow that dances with the flicker of light, making it perfect for showcasing the beauty of butterflies and flowers. As the colors shine through, they ignite wonder and spark imaginative play. Turning an ordinary jar into a whimsical piece invites family bonding, sharing joyful moments together. It’s not just a craft; it’s a cheerful experience filled with memories to cherish.
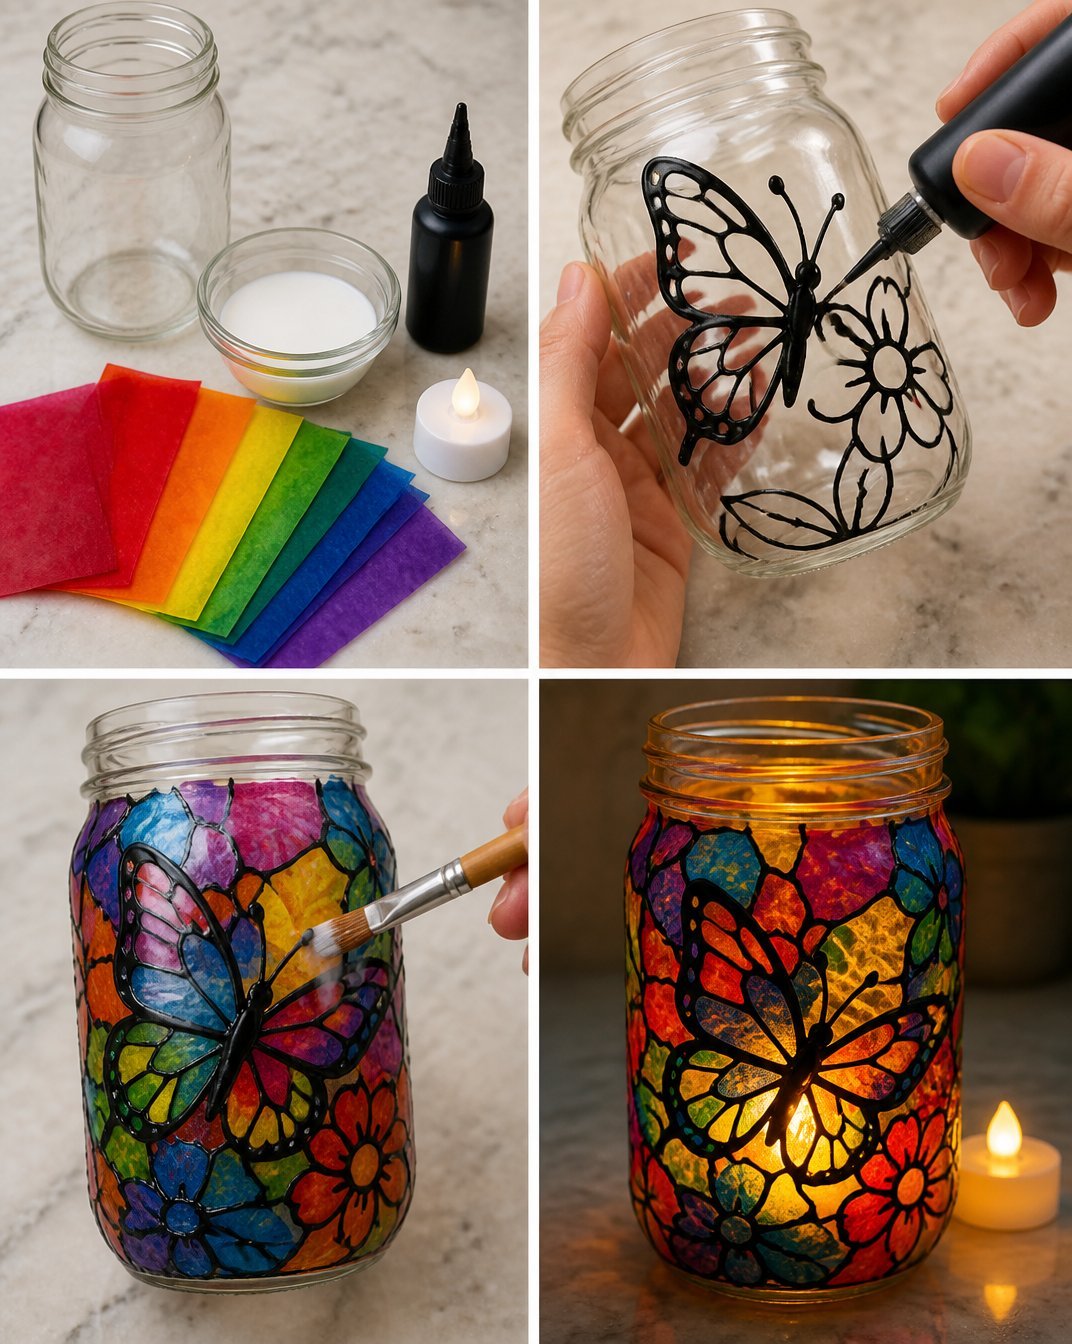
A Quick Look at How It Works
This enchanting craft combines art and a dash of science. Using simple materials, you can create a vibrant stained-glass effect that would bring a smile to anyone’s face. The translucent tissue paper plays the star role, letting light filter through, and the black outlines provide a striking contrast. Watch as the colors spread and mix, creating a little luminary masterpiece. The transformation is truly magical, turning a jar into a glowing treasure.
Materials You Will Need
Gathering your supplies is the first step to creating your Stained-Glass Rainbow Butterfly Jar. Here’s what you will need:
- 1 clear jar
- 3 tbsp gloss decoupage glue
- Translucent tissue in 6 colors (red, orange, yellow, green, blue, purple)
- Black dimensional paint
- LED tea light
All of these items are easy to find and can often be substituted if needed. Make sure to keep the craft materials separate from food items as safety comes first!
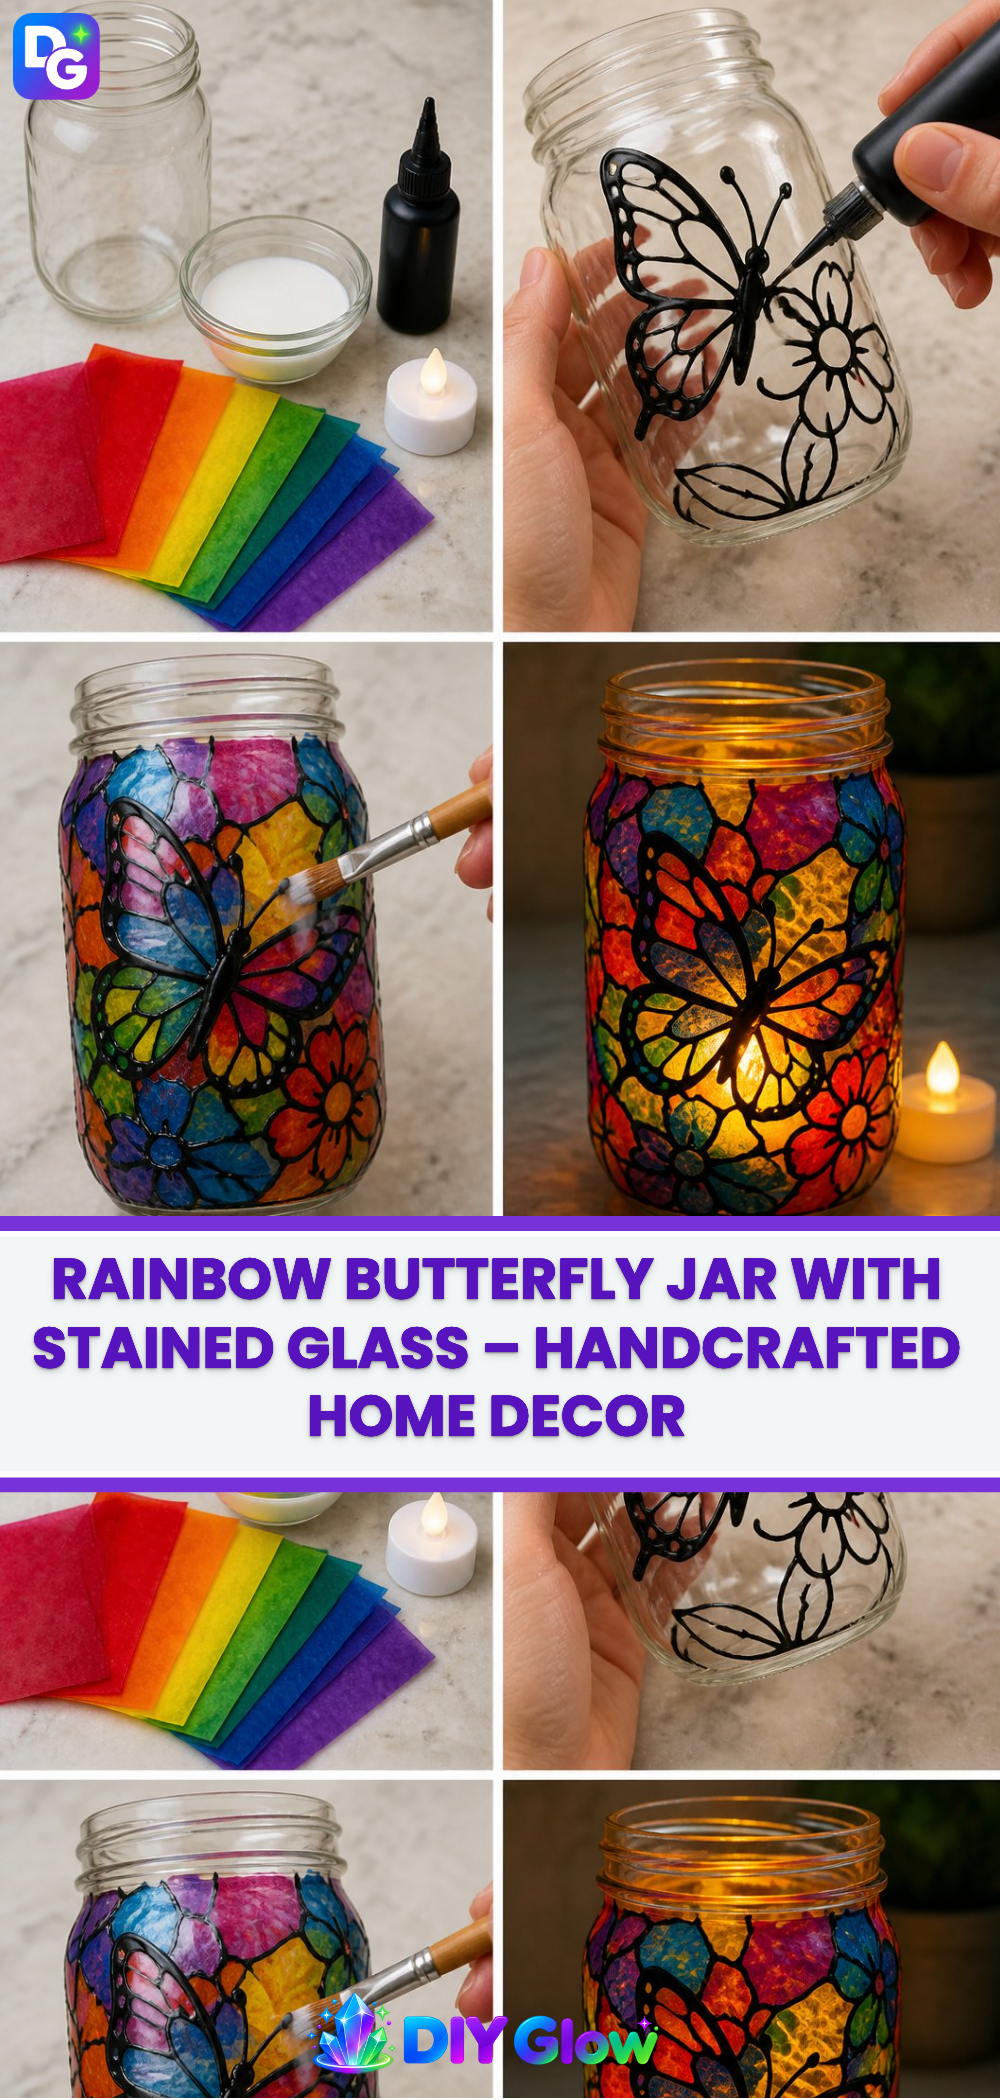
Step-by-Step Directions
Step-by-Step Directions
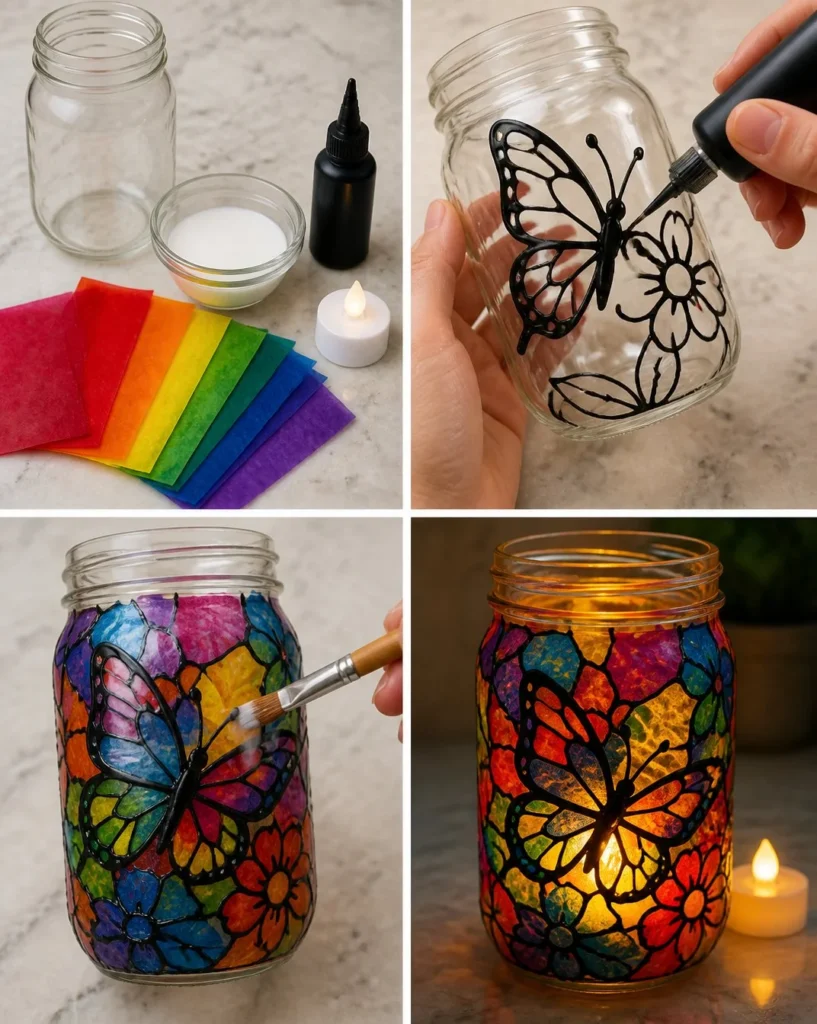
Create black butterfly and flower outlines around the jar.
Start by using the black dimensional paint to sketch out the shapes of butterflies and flowers. This step gets everyone excited as they use their creativity to form unique designs.Fill the spaces with tiny pieces of translucent rainbow tissue and seal them with glue.
Cut or tear the tissue into small squares. As you fill in the outlined shapes, watch the colors come alive. Use the gloss decoupage glue to seal everything in. The glue will dry clear, allowing the colors to shine through beautifully.Allow it to dry completely and then illuminate with an LED tea light.
Patience is key! Let the glue dry thoroughly. Once it’s ready, place an LED tea light inside the jar. When you switch it on, you’ll be greeted by a magical display of colors dancing in the darkness.
Safety Reminder: Always supervise young children, especially during the painting and gluing phases. Use adult assistance for placement and handling of the LED tea light.
Displaying Your Finished Stained-Glass Rainbow Butterfly Jar
Once you’ve created your stunning Stained-Glass Rainbow Butterfly Jar, the fun isn’t over. Think about all the places you could show it off. It looks beautiful on a windowsill, with sunlight streaming through, creating sparkling rainbows. You can also use it as a lovely table centerpiece for family gatherings or cozy evenings at home. If you want to gift your jar, it makes a heartwarming present for friends, grandparents, or anyone who loves a bit of magic in their life.
Keeping Your Stained-Glass Rainbow Butterfly Jar Looking Great
Taking care of your beautiful creation will ensure it remains a vibrant part of your home for a long time. Clean your jar gently with a soft cloth or sponge, avoiding harsh cleaners that might dull the colors. To store it, place it somewhere safe away from direct sunlight for extended periods, as it might fade. If it’s displayed, a quick dusting every now and then will keep it looking its best.
Fun Tips and Colorful Variations
Add a personal touch to your project with these fun ideas:
- Seasonal Themes: Create autumn leaves for the fall or delicate snowflakes for winter. Changing the designs keeps the project fresh and exciting.
- Larger Jars: Use larger jars for even bigger butterflies and more space to play with colors.
- Additional Shapes: Experiment with different shapes, such as stars or hearts, instead of only butterflies and flowers. This opens a world of possibilities.
- Glow-in-the-Dark Finish: For a special touch, consider using glow-in-the-dark paint for the outlines. This adds an extra surprise when the lights go down.
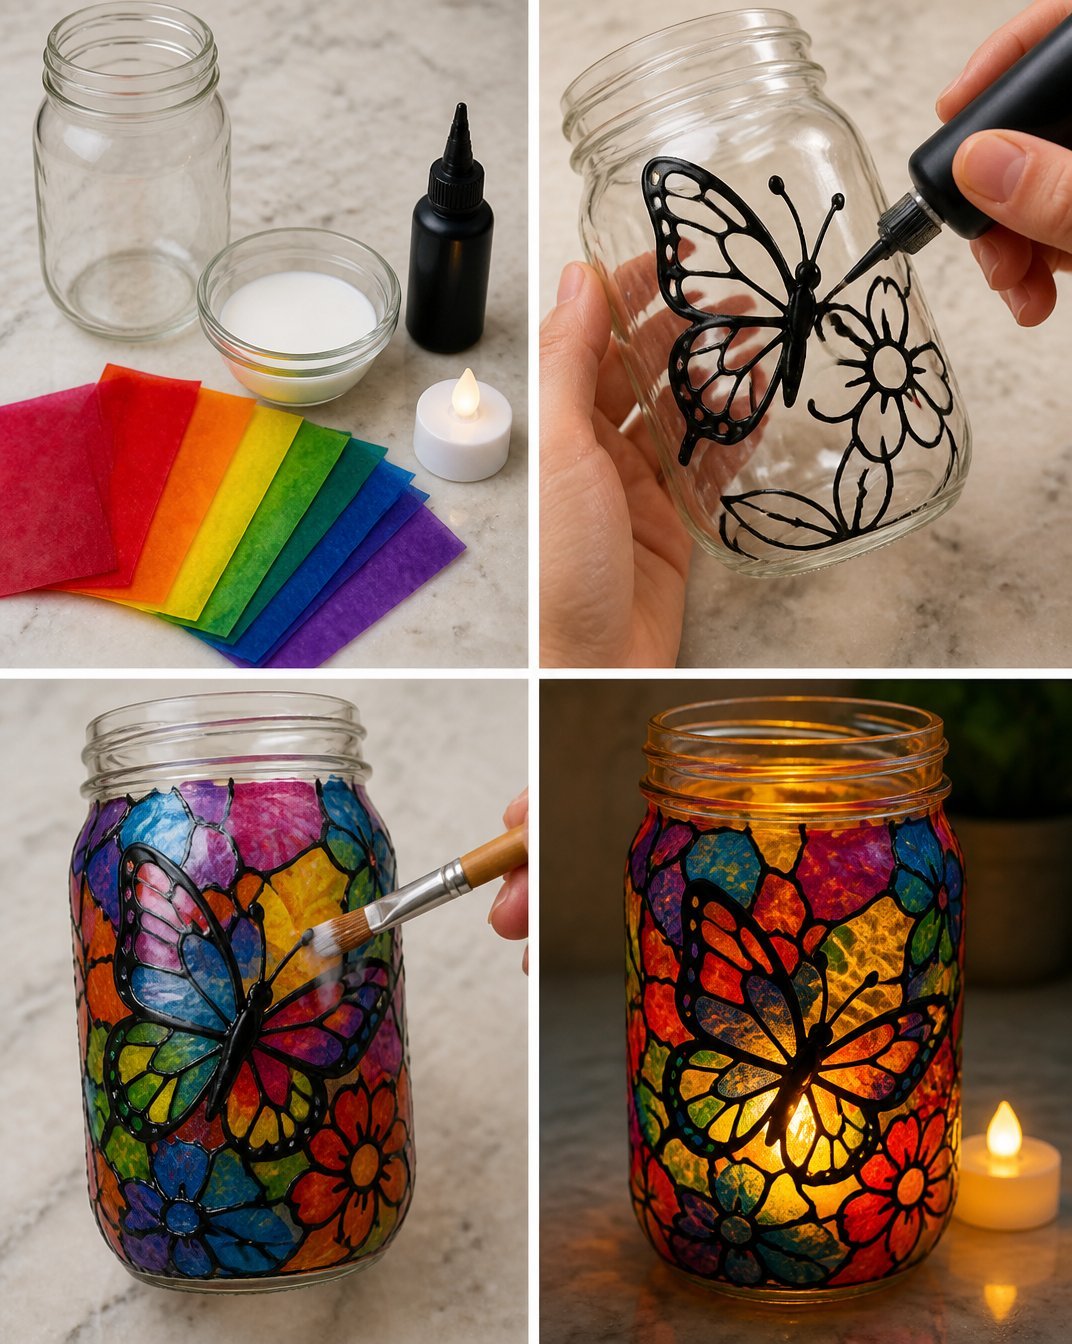
FAQs About Stained-Glass Rainbow Butterfly Jar
Will it work if I use regular paper instead of tissue paper?
Regular paper won’t create the same stained-glass effect since it blocks light. Translucent tissue is essential for achieving that magical glow.
Is this project safe for kids?
Absolutely! Just supervise children closely, especially when using paint and glue. The LED tea light is completely safe to handle.
How long does it take to complete?
The crafting process itself can take about an hour, but drying time for the glue may be several hours. Be sure to let it dry fully!
Why did my jar not turn out as expected?
Sometimes, the glue might not have dried properly, or the tissue could be too thick. Adjust the amount of tissue or ensure the outlines are well defined, and try again!
A Little Note Before You Go
As you embark on the adventure of making your Stained-Glass Rainbow Butterfly Jar, remember to enjoy the process. Embrace the spills, the color mixing, and the delightful surprises along the way. Let each creation reflect your unique style, and don’t hesitate to experiment with colors or designs. Your magical butterfly jar will not only brighten your space but also fill your hearts with joy, turning ordinary moments into extraordinary memories. Keep exploring, crafting, and creating that bright glow in your home!
Follow us on social for more DIY ideas & inspiration!
Stained-Glass Rainbow Butterfly Jar
Would you like to save this project?
By submitting you agree to receive this project and occasional emails. Unsubscribe anytime.
Materials
For the jar creation
- 1 unit clear jar Any size jar will work.
- 3 tbsp gloss decoupage glue Used to seal the tissue paper.
- 6 colors translucent tissue in red, orange, yellow, green, blue, purple Each color should be in small pieces.
- 1 bottle black dimensional paint For creating outlines.
- 1 unit LED tea light To illuminate the jar.
Directions
Creating Designs
- Use the black dimensional paint to sketch out butterfly and flower shapes around the jar.
Filling Colors
- Cut or tear the translucent tissue into small squares and fill in the outlined shapes.
- Seal the tissue pieces with gloss decoupage glue.
Finishing Touch
- Allow the glue to dry completely.
- Once dried, place an LED tea light inside the jar.
Last Step: Don’t forget to leave a rating and comment below! It helps other readers find the best DIY projects — and it helps us too!


